Please provide us with the following information when submitting an inquiry, and someone from the Trefler’s team will help you determine the next steps.

Please describe your item(s) in as much detail as possible. Information such as dimensions, what materials the item is made of (i.e. wood, plaster, porcelain), and your item’s current condition are all very helpful for our experts to make an accurate estimate.

We suggest providing at least three .jpg images per item. These should include; one image of the entire object, and detailed views of the area(s) of damage and/or pieces. 

If you are submitting an inquiry for painting restoration, please provide an additional photograph of the back of the canvas.

Our team will review all inquiries and assess the best course of action to suit your needs.

We look forward to hearing from you.


3389Winter weather advice from Trefler’s claims department

Winter weather advice from Trefler’s claims department

Welcome to winter in New England! If you’ve lived here long enough, you are no stranger to the joys and perils that New England winter weather brings, and if you’re a seasoned homeowner, you understand the potential perils only tenfold. This week, as we brave another bout of inclement snow and sleet, our Claims’ specialists shares advice on how to avoid winter’s most common mishaps, and how to clean up after the worst of them! 

Soot residue from puff-backs or fire incidents alike may stain any exposed surface material in the vicinity. Fortunately, with thorough treatment, remediation is possible.

Puff-backs

Never heard the term? Puff-backs are the occurrence of smoke and soot being forced back into the home through exhaust systems and chimneys. What causes them? Puff backs are created by improperly functioning furnaces, water boilers and heating systems. Unburned fuel can accumulate causing a buildup of flammable material. When starting up a heating system, this leftover fuel ignites, causing an oil burner backfire, forcing smoke and soot back into the home through venting and chimneys. 

A good rule of thumb to avoid a puff-back is to keep an eye on potential signs that your heating system may be malfunctioning. Indicators include a sooty boiler room, a loud noise when starting up and shutting off your heating system, as well as oil leaks and drips along connecting piping. Another important prevention method is to schedule regular maintenance and servicing for your home heating system, as well as frequent professional cleaning to remove potential buildup of residue in your chimney. 

Too late? Fortunately, remediation after a puff-back has occurred is possible, and may be covered by your homeowner’s insurance. Trefler’s frequently works in tandem with clients’ insurance companies to address damage, provide restoration services, and common types of treatment in these events. Typical treatment includes stain and soot removal as well as Ozone treatment to remove lingering smoke odors. 

The table featured above suffered a major water loss in the wake of a pipe bursting in this New England home. Trefler’s furniture conservators were able to successfully treat damage by stripping away a water-stained finish, replacing incidents of bubbling veneer and refinishing the table in its entirety in order to bring back the original luster and sheen of the wood. We are proud to see this stunning piece back in its home.

Freezing Pipes

Water losses due to frozen pipes are one of the most frequent events that Trefler’s claims team encounter each winter. Massachusetts is no stranger to dramatic dips and peaks in temperature in very short periods of time. This extreme variation is a key player in causing pipes to freeze, melt, and essentially burst; resulting in often quite dramatic flooding within the home.

How to avoid frozen pipes? Make sure to always set a consistent base temperature to prevent freezing from the outset. Even if warm weather is anticipated, be sure to put measures in place to avoid any opportunity for your home’s pipes to freeze, especially if you plan to leave (for say a warmer climate) for an extended period of time. If flooding from frozen pipes does occur, time is of the essence. Prevent further mold damage by addressing any flooding event as soon as possible. 

Spring isn’t the end of it…

Although we are all optimists that spring will come early each year, our team urges you to keep in mind that spring is also one of the most frequent times we see pipes burst. Spring in New England means anticipating the inevitable temperature dip, even come early April, so do continue monitoring your home’s heating well beyond winter’s end. 

The before and after images above demonstrate how a finish might appear hazy due to fluctuations in humidity or temperature.

Dry Air Damage

Just like our skin suffers during the winter season, organic materials like wood, leather and paper are similarly affected by the humidity of an interior environment, and lack thereof.

Forced air especially poses problems for items placed near vents and units. Even with the best intentions of conserving energy, if heating is scheduled with fluctuations between day and night, this unstable temperature and humidity will seriously impact wood and leather. 

Trefler’s claims team suggests taking preventable measure to help abate issues caused from dry winter air. For preserving finished wood furniture, simply applying a wax every 6 months can make a major difference in preserving it. How to tell if wood is in need? “You can kind of tell when the finish will start to become a little hazy or less translucent. Other pieces might start to crack, which is a telltale sign that the wood is becoming brittle”. He suggests using a natural wax, such as beeswax for the job. 

Another piece of advice that will help both your furniture and your own health is to invest in an inexpensive humidifier for areas of the home prone to extreme dryness (hint: your bathroom and kitchen will tend to have more exposure to moisture). By keeping the humidity consistent, dry, forced air will have a lesser impact on woods.  

If a piece of wood furniture is oiled rather than coated with a finish, the same rules apply in making sure that wood is cared for and oiled approximately every 6 months to preserve its surface and structure. Cracking is the most extreme result of wood affected by moisture, however warping and shrinking are also a common outcome. 

A fascinating fact that we’d like to share, is that because wood has oils in its natural state, re-applying oil throughout its lifespan keeps it supple and healthy. Even more interesting is that paying attention to the type of wood you’re treating will determine which oils might work best. For example, olive wood is very happy to get some TLC from Olive Oil! 

Already Cracked?

If an item has already suffered damage and shows cracks to its surface, we advise that restoration is still possible. Our furniture specialists can do a conserve on the finish which would include light sanding or re-amalgamating the finish in order to soften and spread the finish to even it out in cases of modest cracking or opening of the wood grain.

This antique carousel horse was severely damaged also due to fire.

Safety First

Another culprit for indoor fire damage is portable space heaters. Even when used under careful supervision, space heaters become extremely hot, frequently damaging textiles and delicate materials in close proximity.

Unfortunately, it’s not uncommon to see the more dramatic and dangerous results of these types of heating equipment each winter, which include fire loss, either to just a few items, or in more extreme cases to fire loss to an entire property. Always unplug and properly turn-off space heaters when not in use, and the same goes for heating pads or other small electrical items, to boot! 

A cherished cabinet that underwent extensive restoration after a fire loss.

Fire: Friend or Foe

We all love to cozy up to a crackling fire come winter. And candles create a greatly relaxing atmosphere during a season of low natural light. However, our claims team tremors at the sight of a tapered candlestick or stack of seasoned firewood. While fire is indeed a sure way to create ambiance at home, it should always be treated with extreme respect and caution. No matter if you’re lighting a candle or a full-blown hearth. Also, even under the best and safest circumstances, fire will still have an affect on items in close proximity to its flame, from trace amounts of smoke and the heat created. Candle wax staining is a less threatening type of damage from fire, but keep in mind that paintings, artworks, and porcelain will be stained or soiled by too much time spent fireside.

If you are currently cleaning up from a winter weather accident yourself, or wish to learn more about how our claims team can help in cases of insurance, fire or water losses, please reach out to a member of our team.


298321 Easy Home Improvement Projects to Refresh Your Home
This Blog Post was originally published on May 10, 2021 by Emily Huddleston on RedFin. To view it there or to visit Redfin, click the link here.

Looking for DIY home improvement projects to spruce up your space? Well, you’re in luck. We tapped some of the top DIY home improvement experts across North America, from Toronto, ON to Atlanta, GA, and asked them to share some of their favorite projects and renovations. From quick fixes such as adding greenery or switching up the lighting, to slightly bigger tasks, such as painting a dresser or creating a statement wall, there are plenty of easy ways to refresh your home. 

So whether you’re trying to sell your house or simply want to upgrade your space, these easy home improvement ideas can help you get started!

1. Paint wood cabinets with chalk paint. The most budget-friendly way to update a kitchen or bathroom and refresh your home is to paint the cabinets with chalk paint. It is super easy to do and makes a huge impact on a high traffic space for very little money. – Bricks ‘n Blooms

2. Change the light fixtures. Switching out the lights can make a big impact without breaking the bank and devoting a lot of time. There’s a multitude of beautiful, inexpensive lighting options out there to choose from. And swapping out a fixture takes only a couple of hours, max. – Two Twenty One

3. Refresh your pantry with shallow shelving. For an easy pantry makeover, use shallow shelving installed from the floor to the ceiling (so long as it’s not beyond reach) instead of the standard 12-18” deep shelves in a pantry. This will prevent pantry items from being hidden and forgotten behind other items. Make the shelves adjustable for even more customization and organization. – Reinvented Delaware

4. Add character to a room with built-in bookshelves. Our favorite home improvement project to refresh a space or room is a DIY built-in bookcase filled with colorful books & accessories. The double-sided built-in bookshelf with a hidden bookcase door we built transformed our space. – Hello Small World

5. Spice up a room with a luxurious stenciled wall design. Modern stencils are easier to use than ever and can produce a finish that rivals even the most expensive wallpapers. For a more subtle update, try the same paint in two different sheens to give a sophisticated layered look. – The Copper Elm

6. Beautify your laundry room. I use my laundry room every day, and while it may not be a show stopper like kitchen or bathroom changes can be, I am happy when I look in here and it makes it less frustrating to laundry all the time. Making the space cheerful and having it work for me at the same time was the real win. – Jessica Rayome

7. Work with what you have to refresh your home. Outdated cabinets? Give them a fresh coat of paint and add new hardware for an updated look. Ugly linoleum or tile floors? Use paint to create a stencil pattern and add more years of life. Stained Formica countertops? Purchase an epoxy countertop kit and give them a marble or granite look for a fraction of the cost of replacing. – This Full Life 5

8. Update a room with your favorite art pieces. For each room in your new home, pick one favorite framed piece of art and hang complimentary pieces according to how you want that room to feel. Experiment with asymmetrical hanging designs to create a more dynamic and interesting look and feel to your space. Also, consider restoring treasured works of art and updating framing for preservation. – Trefler’s

9. Transform a room with simple wall molding and paint. You can elevate your space by installing a unique wall treatment, like board and batten, shiplap, or wainscotting. Then, pull it all together with a fresh coat of paint to modernize it with a color that fits the color palette for your home. – Sarah Symonds, Grace In My Space

10. Paint a piece of furniture. Painting furniture is a quick, easy, and inexpensive way to change up the look of your space and refresh your home. – Three Coats of Charm

11. Update your laminate cabinets to refresh your home. Creating a home you love doesn’t have to cost a fortune. With a can of spray paint and some shelf brackets, this homeowner turned a builder-grade laminate cabinet into a beautiful coastal farmhouse-style cabinet. – K’s Olympic Nest

12. Personalize your home office. With the shift to working from home, my tip is to personalize the home office in a fun, easy, and affordable way. For example, you can update an old filing cabinet to suit your style by painting it and adding a set of cool legs. – BB Frösch

13. Add a touch of greenery to transform any room. Tall, willowy trees fit empty corners perfectly, while potted plants in between pieces bring softness to the hard angles of a room. To warm up the cold feel of glass and metal, use a small topiary or bonsai plant to add organic lines to an often rigid, contemporary style. It’s time to bring your room to life, one sprig of rich greenery at a time. – Furniture of America

14. Create stylish organization through built-in storage. Building a closet organization system with drawers and shelving will make the closet look clutter-free and well organized. Adding window seats with storage, either drawers or cubbies with stylish storage bins can help remove clutter in bedrooms, dining rooms, or living rooms. In addition, there are many tutorials available online for how to create DIY built-in storage systems to fit your needs. – Pinspired to DIY

15. Refresh hallway doors on a budget. Many older homes have core hollow doors which can be expensive to replace. Instead of purchasing all new doors, you can use picture frame molding, a miter box (or miter saw), and liquid nails to create the look of a paneled door. Add a fresh coat of paint and you have “new” doors for under $20. – Grace and Maura

16. Think outside the box when it comes to painting. When you’re looking to refresh your home, don’t just paint a wall one color – instead color block or stencil it. Also, don’t just paint walls – instead paint fixtures, counters, or even your fireplace with spray paint or regular paint. There are so many wonderful paint products out there that will help you level up your room’s vibe and style in a cost-effective way. – My Homier Home

17. Rethink your outdoor space. Outdoor space is often an untapped resource in a home. With pea gravel as a base, we transformed a weedy, muddy spot next to our back patio into an awesome hangout. If your home is feeling tight, think beyond its walls and look to the great outdoors. – Modern Chemistry at Home

18. Create a statement wall. A statement wall can instantly update or change the entire vibe of a room, and a bonus is that It’s an easy, inexpensive DIY that you can complete in a weekend using paint, wallpaper, wood, or even leftover shims. – A Life Unfolding

19. Make affordable, but impactful updates in your kitchen. I recently redid our kitchen for under $1000 and it made the space feel brand new. The cabinets were brown, laminate countertops, white appliances, and an electric range with an old sink. We switched out the sink and the range to electric, painted the cabinets, and then did a DIY faux marble finish on the countertops. It completely changed the space to make it look brand new on a budget. – A Yellow Peach

20. Change out your wall decor to refresh your home. Fiber-based art is great for softening a space and metal pieces can lend to an industrial feel. Even if you are simply shifting your favorite pieces into different rooms, switching up your decor can make a space feel new. – Danielle Kaminski

21. Switch out builder-grade wire shelving in a linen closet. Nobody likes the look of the wire shelving that comes standard in most houses.  So, we built wooden covers to fit over the existing shelves that look like real wood floating shelves. This doesn’t add much weight to the shelves, makes them look better and more functional with the flat surface, and was inexpensive because we used plywood. – Newbuild Newlyweds


2861Prepping outdoor entertainment areas for warmer days ahead

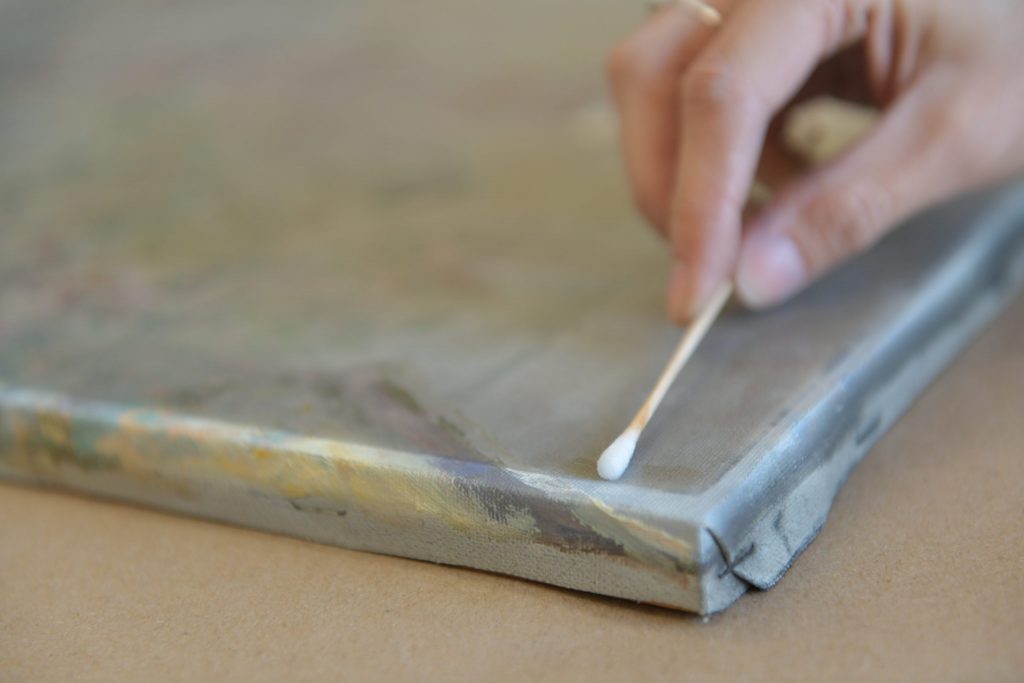
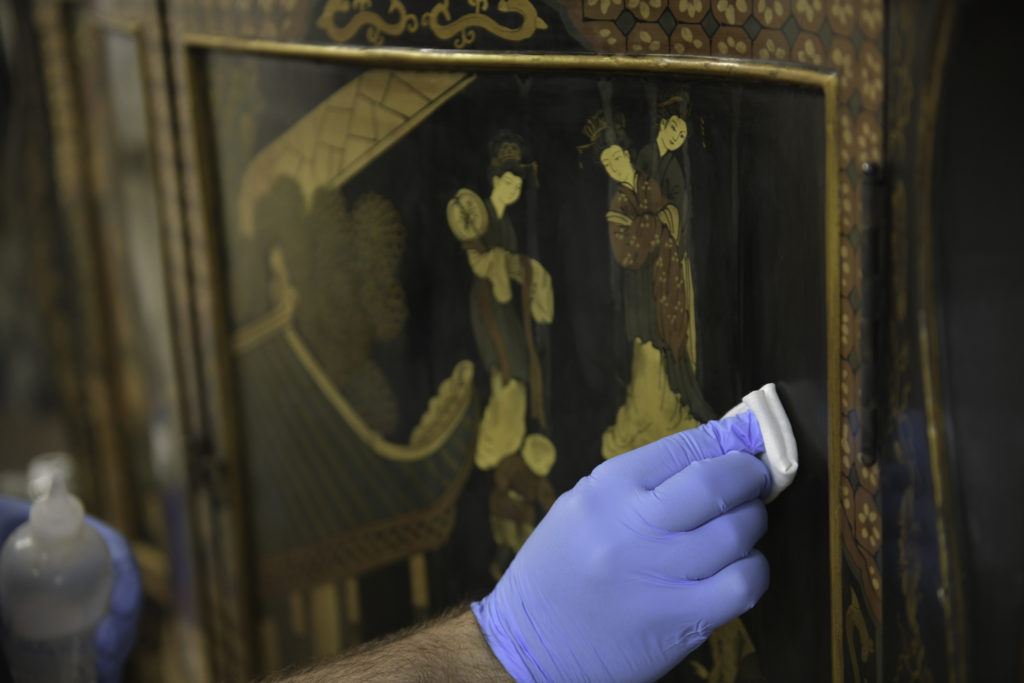
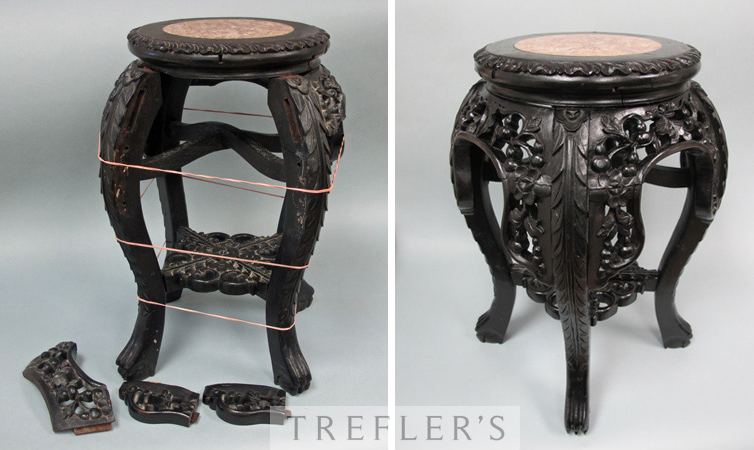
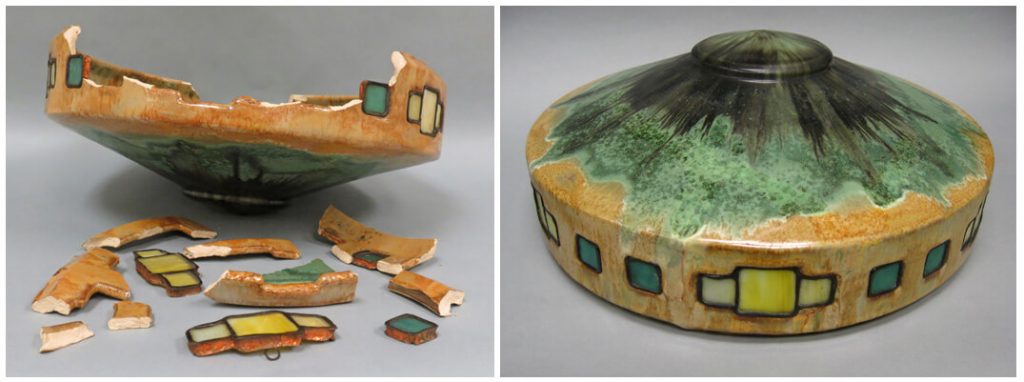
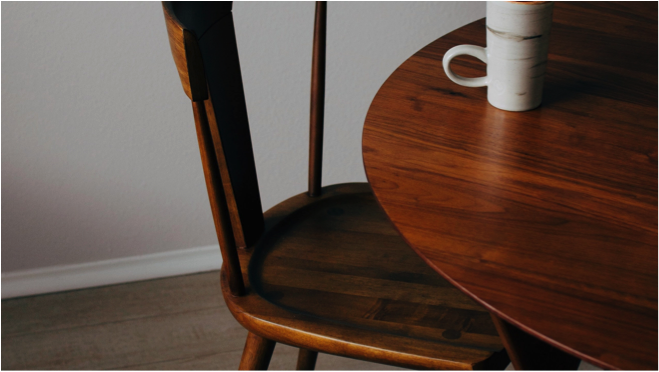
The image above was taking during an on-site to treat a damaged patio set. Precise color-matching recreated the detailed, stippling effect that had been damaged due prolonged exposure to sun and humidity.

Summer in New England is on its way

April 20th marked the first day of spring on our calendars, and despite the sometimes late arrival of warmer weather in New England, it is a perfect time to begin prepping your patios, summer homes, porches and back yard lawn furniture to ensure that you are right on time to make the most of your outdoor entertainment spaces this upcoming season. 

Prepping in advance and learning life’s rhythms 

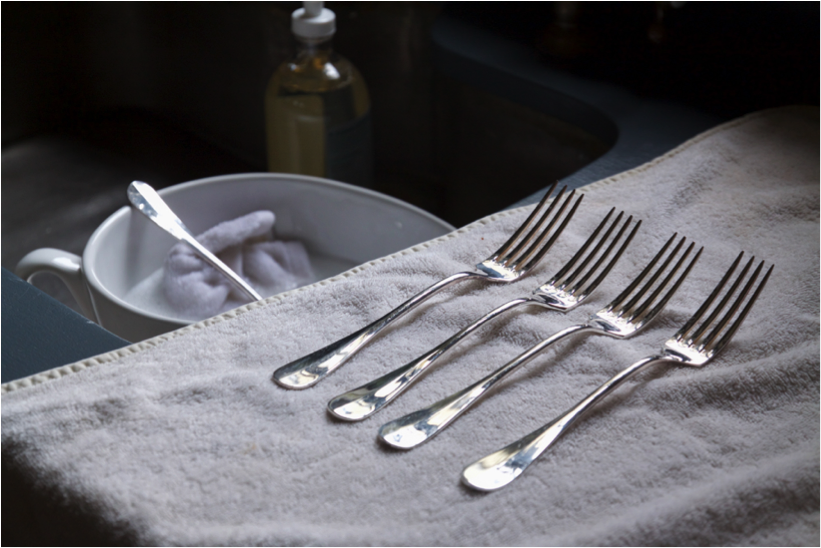
One interesting aspect of operations at Trefler’s is learning seasonal rhythms of what possessions visit the studio for some TLC, when. One of our aims is to help educate, and gently remind our client’s, when items should come in for say, a tune-up. Sterling silver will visit for a polish prior to holidays like Passover or Easter. Water claims arrive promptly come December and stay through April. Unsurprisingly, restoring and conserving outdoor furniture and lawn ornaments take their turn in March and April. 

Bringing an item in for conservation in early spring ensures that it will be in beautiful, and functional condition to be enjoyed as soon as possible. And there is no doubt, this year in particular, our outdoor home entertainment areas will provide a most welcomed escape from our now very over-used livings rooms and dens. 

Below is a little extra guidance on how to best store items to prevent damage, and explanations for the type of restoration projects we tackle most often for our clients’ outdoor furniture.  

Basement winter storage and avoiding damage 

Winter weather takes a heavy toll on outdoor furniture and lawn ornaments. And even if your Adirondack chairs or bird feeders were stashed in the basement throughout the colder seasons, a wet winter can mean that despite your best intentions, stored items like upholstered cushions or wooden furniture might emerge damaged, or in the least giving off that very particularly unpleasant, musty smell. 

“This was a pretty rough winter weather-wise,” Kody Kirkland, Trefler’s claims specialist remarks, “especially with the snow melt, things will get moist in basements. If your sub-pump can’t keep up, this can damage wood and metal leading to rot, rust, or mold to upholstered cushions.” 

Kody’s advice, “try storing things off the floor if possible. Things like metal shelving or wood blocks are great for keeping furniture elevated and off basement floors, where they are prone to water damage.”

Water and moisture aren’t the only issue in basement storage. Dust and critters also pose problems. Kody suggests, “you can try wrapping things in plastic so they are protected from dust, accidents, moisture, and also bugs and spiders. Your items will come out requiring less cleaning time this way as well.” 

The types of conserves Trefler’s undertakes most often with outdoor furniture 

What is a conserve? A conserve is the process of treating damage to restore an item to its former condition, and also importantly to prevent the process of damage to continue further. 

Bleaching and UV-damage to finishes 

The conservation process for wooden furniture often includes a light sanding, and adding color to even out the finish in cases of sun or UV-damage. Picture if your furniture has tan-lines from sitting in the sun facing one direction for an entire season. Because of the sun’s powerful effect, it is extremely common for furniture that is stationery to have a fade of color on the side exposed directly to the sun.

Is there a way to prevent bleaching to outdoor furniture? SPF anyone? 

“There’s nothing you can really do to prevent bleaching, but you can definitely get things conserved so that it brings back the color and is a little healthier in the long run.”  Come September, you could opt for a conserve prior to storing summer furniture for the winter season.

An annual conserve will ensure that your outdoor furniture, particularly wooden furniture, is healthy and hydrated prior to being tucked away in storage for the winter.  Kody also advises that, “oiling and waxing can help. By using a colored wax, you can even out color fade where there’s been bleaching from sun damage. This is most commonly done if you’re going to try to cover up sun damage, strip and refinish or conserve.”  

Rust Remediation: stopping a chemical process in its tracks 

If you live by the ocean, you are likely well acquainted with the negative effect that salty air and humidity have on anything that lives outside and is made of metal. The process of rusting is a nasty and quick moving one; so if you spot rust on metal outdoor furniture, it is extremely important to do a conserve to prevent this process from continuing onward. A conserve in this context involves removing as much of the rust spot as possible and applying a rust converter to affected areas.

What is a rust converter? Essentially, it is a liquid that you paint on that chemically puts a layer over the rust so that the chemical reaction of rusting is prevented. In chemistry terms, it converts iron oxides into a protective chemical barrier, so that the process of rusting is stopped in its tracks. 

Musty upholstery

While outdoor grade fabrics boast the qualities of being “water-resistant” they still inevitably fall victim to moisture damage during winter storage. Upholstery tucked away in basements during wet winters inevitably emerges musty. If the damp has really taken effect, irreversible staining can render once attractive cushions soiled and yellowed. Our advice? Try storing cushions wrapped in plastic or in airtight containers. You’ll be more likely to have fresher smelling, and undoubtedly cleaner cushions, when it’s time to use them. Too late? Trefler’s works with a trade only upholsterer in the event that it’s time to replace or re-cover badly stained cushions or pillows. 

Interested in learning more about how to safely store and conserve your outdoor furniture for the summer season? Reach out to a member of our team today to get started and prep for warmer days to come! 


2756Winter weather advice from Trefler’s claims department

Winter weather advice from Trefler’s claims department

Welcome to winter in New England! If you’ve lived here long enough, you are no stranger to the joys and perils that New England winter weather brings, and if you’re a seasoned homeowner, you understand the potential perils only tenfold. This week, as we brave another bout of inclement snow and sleet, our Claim’s specialist Kody Kirkland shares advice on how to avoid winter’s most common mishaps, and how to clean up after the worst of them! 

Soot residue from puff-backs or fire incidents alike may stain any exposed surface material in the vicinity. Fortunately, with thorough treatment, remediation is possible.

Puff-backs

Never heard the term? Puff-backs are the occurrence of smoke and soot being forced back into the home through exhaust systems and chimneys. What causes them? Puff backs are created by improperly functioning furnaces, water boilers and heating systems. Unburned fuel can accumulate causing a buildup of flammable material. When starting up a heating system, this leftover fuel ignites, causing an oil burner backfire, forcing smoke and soot back into the home through venting and chimneys. 

A good rule of thumb to avoid a puff-back is to keep an eye on potential signs that your heating system may be malfunctioning. Indicators include a sooty boiler room, a loud noise when starting up and shutting off your heating system, as well as oil leaks and drips along connecting piping. Another important prevention method is to schedule regular maintenance and servicing for your home heating system, as well as frequent professional cleaning to remove potential buildup of residue in your chimney. 

Too late? Fortunately, remediation after a puff-back has occurred is possible, and may be covered by your homeowner’s insurance. Trefler’s frequently works in tandem with clients’ insurance companies to address damage, provide restoration services, and common types of treatment in these events. Typical treatment includes stain and soot removal as well as Ozone treatment to remove lingering smoke odors. 

The table featured above suffered a major water loss in the wake of a pipe bursting in this New England home. Trefler’s furniture conservators were able to successfully treat damage by stripping away a water-stained finish, replacing incidents of bubbling veneer and refinishing the table in its entirety in order to bring back the original luster and sheen of the wood. We are proud to see this stunning piece back in its home.

Freezing Pipes

Water losses due to frozen pipes are one of the most frequent events that Trefler’s claims team encounter each winter. Massachusetts is no stranger to dramatic dips and peaks in temperature in very short periods of time. This extreme variation is a key player in causing pipes to freeze, melt, and essentially burst; resulting in often quite dramatic flooding within the home.

How to avoid frozen pipes? Make sure to always set a consistent base temperature to prevent freezing from the outset. Even if warm weather is anticipated, be sure to put measures in place to avoid any opportunity for your home’s pipes to freeze, especially if you plan to leave (for say a warmer climate) for an extended period of time. If flooding from frozen pipes does occur, time is of the essence. Prevent further mold damage by addressing any flooding event as soon as possible. 

Spring isn’t the end of it…

Although we are all optimists that spring will come early each year, Kody urges us to keep in mind that spring is also one of the most frequent times we see pipes burst. Spring in New England means anticipating the inevitable temperature dip, even come early April, so do continue monitoring your home’s heating well beyond winter’s end. 

The before and after images above demonstrate how a finish might appear hazy due to fluctuations in humidity or temperature.

Dry Air Damage

Just like our skin suffers during the winter season, organic materials like wood, leather and paper are similarly affected by the humidity of an interior environment, and lack thereof.

Forced air especially poses problems for items placed near vents and units. Even with the best intentions of conserving energy, if heating is scheduled with fluctuations between day and night, this unstable temperature and humidity will seriously impact wood and leather. 

Kody suggests taking preventable measure to help abate issues caused from dry winter air. For preserving finished wood furniture, simply applying a wax every 6 months can make a major difference in preserving it. How to tell if wood is in need? “You can kind of tell when the finish will start to become a little hazy or less translucent. Other pieces might start to crack, which is a telltale sign that the wood is becoming brittle”. He suggests using a natural wax, such as beeswax for the job. 

Another piece of advice that will help both your furniture and your own health is to invest in an inexpensive humidifier for areas of the home prone to extreme dryness (hint: your bathroom and kitchen will tend to have more exposure to moisture). By keeping the humidity consistent, dry, forced air will have a lesser impact on woods.  

If a piece of wood furniture is oiled rather than coated with a finish, the same rules apply in making sure that wood is cared for and oiled approximately every 6 months to preserve its surface and structure. Cracking is the most extreme result of wood affected by moisture, however warping and shrinking are also a common outcome. 

A fascinating fact that Kody shared, is that because wood has oils in its natural state, re-applying oil throughout its lifespan keeps it supple and healthy. Even more interesting is that paying attention to the type of wood you’re treating will determine which oils might work best. For example, olive wood is very happy to get some TLC from Olive Oil! 

That being said, we always encourage everyone do their research and exercise caution when taking on projects at home. Have a question for our restorers? We always welcome the opportunity to advise our clients and community on the best practices for keeping items in tip-top condition. 

Already Cracked?

If an item has already suffered damage and shows cracks to its surface, Kody advises that restoration is still possible. Our furniture specialists can do a conserve on the finish which would include light sanding or re-amalgamating the finish in order to soften and spread the finish to even it out in cases of modest cracking or opening of the wood grain.

This antique carousel horse was severely damaged also due to fire.

Safety First

Another culprit for indoor fire damage is portable space heaters. Even when used under careful supervision, space heaters become extremely hot, frequently damaging textiles and delicate materials in close proximity.

Unfortunately, it’s not uncommon to see the more dramatic and dangerous results of these types of heating equipment each winter, which include fire loss, either to just a few items, or in more extreme cases to fire loss to an entire property. Always un-plug and properly turn-off space heaters when not in use, the same goes for heating pads or other small electrical items, to boot! 

A cherished cabinet that underwent extensive restoration after a fire loss.

Fire: Friend or Foe

We all love to cozy up to a crackling fire come winter. And candles create an unbeatably relaxing atmosphere during a season of low natural light. However, our claims team tremors at the sight of a tapered candlestick or stack of seasoned firewood. While fire is indeed a sure way to create ambiance at home, it should always be treated with extreme respect and caution. No matter if you’re lighting a candle or a full-blown Hearth. Also, even under the best and safest circumstances, fire will still have an affect on items in close proximity to its flame, from trace amounts of smoke and the heat created. Candle wax staining is a less threatening type of damage from fire, but keep in mind that paintings, artworks, and porcelain will be stained or soiled by too much time spent fireside.

If you are currently cleaning up from a winter weather accident yourself, or wish to learn more about how our claims team can help in cases of insurance, fire or water losses, please reach out to a member of our team.


1238Framing to Prevent Light Damage – Protecting Your Artwork

Far too often framing is viewed as merely decorative; an ornamental addition to artwork which can add to the visual impact of a piece and ground it within its environment. And while this is indeed true, suitable framing also plays a pivotal role in conserving and protecting artwork, acting as an armor against potential damage from exposure to damaging elements such as moisture, dust and light.

The condition of photography, prints and even textile fibers can be maintained safely through appropriate framing and installation. Fading of colors is of course one concern, but yellowing is another unwanted and highly common outcome of light exposure. This is most frequently seen on paper and silk mattes; turning them from pristine whites, to not so lovely shades of yellow.


As you might guess, most light damage originates from natural sources such as the sun’s UV’s, otherwise known as ultraviolet light. However, even rooms devoid of windows can be hazardous to improperly framed artworks, textiles and photographs, and just because items are stored in basements, attics, or artificially-lit spaces, fading and yellowing can be the result of prolonged exposure to UVs emitted from fluorescent bulbs.

Fortunately, prevention from light damage is fairly straightforward and achievable in a few simple steps below:

Your first option, (and perhaps the most obvious) is preventing artworks from light exposure by ensuring they are hung on walls in your home that receive the least direct sunlight or fluorescent lighting. Another reminder is to be aware of track or spotlights that project a concentrated amount of lighting directly at artworks.

Be Mindful of Seasonal Changes
Do also keep in mind when installing or hanging artwork that although a portion of your wall may be safe from the sun in March, come April its rays will be rising and setting at a completely different angle exposing your pieces to damaging light sources at a later date.

UV-Filters for Glass and Plexi-glass
Another method to ensure light protection is framing your artworks with a UV-filtering glaze for the transparent portion of the frame. This is available in both glass and Plexi-glass panels, and customizable to any size required. This added barrier will ensure protection from both artificial and natural light sources.

And finally, while sometimes it is too late, and the damage is already done to a piece, restoration is an available option. Our conservators and restorers at Trefler’s are able to assist in any questions you may have regarding an area of concern, and our highly skilled framers can help to ensure your artworks remain safe from environmental damage.


Written by Nikki Stracka

11477 tips for Sourcing Vintage Furniture and Antiques Online

While there is nothing quite like the hunt at a Sunday estate sale, or antiques market, there are absolutely added benefits to shopping and sourcing antiques and vintage homewares digitally. For one, you never have to lug the actual item home with you – which will delight your chiropractor. It also affords you the luxury of taking time to think about a purchase without having an impatient dealer rattle you over a game of haggling. For those interested or new to online sourcing, below are several things to keep in mind before checking out.

1. Do Your Research

Gone are the days of information scarcity. While it can feel overwhelming, the wealth of knowledge provided by the internet equips the casual furniture buyer and amateur antique collector with a multitude of sources for researching prospective goods before buying – or bidding. When considering purchasing antiques or collectibles online, be sure to investigate similar items on other sites. Prices from previous auctions are often available. Be sure to check out smaller auction houses, for more obscure collectibles.

2. Don’t be Intimidated

Gone are the days of information scarcity. While it can feel overwhelming, the wealth of knowledge provided by the internet equips the casual furniture buyer and amateur antique collector with a multitude of sources for researching prospective goods before buying – or bidding. When considering purchasing antiques or collectibles online, be sure to investigate similar items on other sites. Prices from previous auctions are often available. Be sure to check out smaller auction houses, for more obscure collectibles.

3. Know Your Limits

It’s helpful to avoid potential buyer’s remorse by setting a price cap prior to bidding on online auction sites. This takes the element of emotion and impulse out when the stakes are high at the end of a sale. It might feel good in the moment to win out against your competitor, but you’re liable to overspend in the final moments.

4. Pay Attention to Fine Print and Hidden Fees

An auction estimate may often look too good to be true and it may just be. Keep in mind that online auction sites often take additional fees calculated after the sale. Other things to remember are potential taxes or tariffs, especially when buying internationally. Finally, always check shipping rates prior to making a purchase; they can at times be significantly more expensive than the item itself.

5. Location, Location, Location

As mentioned, being aware of crating or shipping fees is extremely important. Always check to be sure the item you’re after is available for shipping and not local pick-up only. This can be a headache of a mistake to make, especially when the pickup location calls for a road trip to Arkansas. Local pick-up only can also be to your benefit, however. Frequently items that are pick-up only can be discounted to account for the added inconvenience of retrieval, which means if you have a car or can take an Uber XL to get there, it may be worth the extra legwork.

6. Be a Loyal Customer

Chances are, if you like one item a seller has on offer, you’ll like more. Sites like eBay and 1st Dibs make it easy to save and follow sellers or dealers you enjoy, and can even be configured to send push notifications next time they add more to their online collections.

7. Get Use Out of Your Tape Measure – And Double Check

Although seemingly obvious, it is so important to actually measure the amount of space the physical item will take up in your home before committing.  Online images can be extremely deceiving in terms of size, and what appears large may in fact not be so substantial compared to your existing furniture, and vice versa. Always measure the true dimensions. You can use painter’s tape to mark out a silhouette, or even place a sheet down in the dimensions of the new piece of furniture, to help to visualize if it fits its surroundings appropriately. Also – Always measure door frames, as well as turns in hallways if the item needs to take a trip upstairs.

Written by Nikki Stracka

1274‘To Conserve or To Refinish?’ Differences in Restoration Processes You Need to Know

Restoring your antique furniture and keepsakes is not only a great way to breathe life back into treasures but also is more environmentally-friendly than purchasing new furniture and collectibles. Restoring can also be an opportunity to customize your piece to suit your needs. And don’t forget, restoration work is an art form! We refinish and conserve your treasured objects, furniture, and memorabilia because we truly enjoy it!

The two main restoration processes are conserving and refinishing. In both cases, we could be replicating missing pieces. In both cases, we could be touching in details that have worn from time and use. There are, however, a number of important differences.

Conserving involves leaving the original finish and details intact while improving the overall look of the piece. The current condition and existing finish of the piece are gently treated with preventative care to protect the surface from further damage. Keeping the existing finish helps retain the value and authenticity of the piece. This sustains the character of the piece, which is especially important with ‘one-of-a-kind’ items.

Refinishing involves stripping the existing finish, sanding, then hand applying a new finish. This is done for pieces with damage that goes below the surface of the finish, like a deep scratch or a burn. While in such cases it is necessary to remove the finish, this is done in a way to minimize a difference in appearance from the old to the new.

Refinishing offers a flexibility that conserving does not. When you refinish a piece, you can change the style and color to your liking. Perhaps you’ve inherited a scratched dining room table that doesn’t quite fit the color scheme of your dining room, perhaps you’ve bought an antique chest that you’d prefer in a lighter shade: these are refinishing jobs.This technique is ideal for showcasing the distinctive character of a piece and promotes a fresh new look. The refinishing process can be more time consuming but offers superior overall transformation.

When you’re deciding between conserving or refinishing your piece, think about the amount of change you want for the piece. If you are seeking a drastic transformation in the overall look, that would be a refinishing job. If you prefer keeping the piece as close to the original as possible, that would be a conserving job.

Conserving a piece requires slightly fewer materials than refinishing one. Also, conserving requires less time than refinishing so the turnaround is quicker. However, sometimes, given the condition of a piece, it simply cannot be conserved and has to be refinished.

Whichever you decide, we look forward to working on your piece. We will consult with you throughout the process to ensure your piece is restored to your satisfaction.

Written by Meaghan McNally, Conservator, Furniture Department

1293Spring Cleaning: Repairing the Stained, the Chipped and the Tarnished Left Behind from this Winter Season

With the Spring season upon us, we look in our closets, cabinets, and cupboards to clean out those items damaged during dinner parties and long weekend afternoons spent indoors. Wine glasses scratched from holiday entertaining, well-loved teacups with chipped rims, dining room and side tables stamped with ring marks are among just a few of the Spring-time repairs we undertake for our clients at Trefler’s. While discarding of damaged pieces is at times appropriate, many can be remedied and enjoyed for years to come.

Candle Wax Removal

Long, tapered candlesticks are a mainstay of holiday table settings, and while they create a warm mood, their presence is often not soon forgotten once they’ve been stored for the next seasonal soirée. Wax spills can damage the finish on wood or painted dining room tables, and appropriate removal and cleaning is important to prevent further surface damage. Our team of trained restorers at Trefler’s have done countless wax removal projects from items including: furniture, antique books, and upholstery.

Ring Marks

Ring marks left from condensation is unfortunately an all too common worry for owners of wooden, lacquered, and painted furniture. While these unsightly marks left from entertaining or just plain personal mishaps might illicit panic – cue flashback of Monica on the sitcom Friends – one of our trained restorers can easily resolve the issue.

Tarnished Silverware and Serving Pieces

Using heirloom silver is a wonderful way of continuing family traditions, however, our busier, modern lifestyles are not always conducive to caring for these items. Silver in particular necessitates time consuming polishing, care and storage to maintain its sheen and protect it from deterioration. It is imperative to properly clean and store silverware and serving pieces after use to ensure that when they are taken out next, they are free from rust and tarnish, which can irreversibly damage them over time.

Chipped Glass and Crystal

Chipped rims on glass and crystal drinkware and serving ware can be ground or filed to restore edges completely. Instead of throwing away these items, bring them in and our team of specialists will extend their useful life for years to come.


For more information on our restoration and conservation services, click the link below or call us at (617) 965-3388. We look forward to hearing from you.

1340What You Need to Know Before Beginning Your DIY Furniture Upholstery Project

At Trefler’s, we have met a lot of people who began DIY furniture restoration projects over the years, only to run into various challenges — some of which cannot be entirely fixed. This is particularly true when aiming to reupholster antique furniture. In order to prevent such issues and damages, you need to take a proactive approach. Educating yourself now could make all the difference in terms of the final upholstery outcome. Whether you would like to upholster a chair or sofa, we have created a list of top tips to assist your efforts.

Why Reupholster Old Furniture?

There are many reasons why you may want to reupholster old pieces of furniture, especially if it looks overly dirty or dated. Best of all, reupholstering old furniture ensures that pieces are unnecessarily kept out of landfills. Just some of the main reasons why you may want to reupholster furniture include:

Cost-effectiveness

Instead of purchasing new furniture, you can often upcycle old pieces, especially when reupholstering furniture that features a solid wooden frame. Please note: Although you will pay more to work with a professional, in many cases, this can save you money in the long-run. This is especially true if you have little experience and waste a significant amount of fabric.

Quality

Older furniture was often handcrafted and well-built. For example, if you are debating on reupholstering furniture that has a solid frame, comfortable feel, or strong springs, it may be worth the investment. In this case, professional antique furniture restoration can go a long way.

Emotional value

In other cases, furniture is passed down from one generation to the next, offering high levels of sentimental value. Although reupholstering furniture is common practice, especially when it means something to one of our customers, a DIY approach can end badly if the right steps aren’t taken. Once again, when dealing with heirloom pieces, seeking a professional opinion is recommended.

6 DIY Furniture Restoration Tips to Help Guide You Along Your Reupholstery Journey

With the rise of the Internet, more and more people are attempting a wide range of DIY projects. While it may be fun to try and make your own headboard or garden planter, reupholstering is a whole other beast — one that takes patience, care, and expertise. If you are interested in reupholstering special pieces or would like to restore furniture by using DIY techniques in general, here’s what you need to know.

Tip #1: Cheaper isn’t always better

Many take a DIY approach because it’s cheaper — or they invest in those who offer the cheapest quote. Although it’s important to set a budget and stick to it, you need to be mindful of the quality of work. For example, if you plan to reupholster a sofa and keep it for another fifty years, a small difference in savings is not worth a poorly finished job.

Tip #2: Understand that not all furniture fabrics are equal

When it comes to the quality of furniture fabrics, as well as how they behave, not all are created equal. For example, canvas behaves much differently than leather, so each variable needs to be considered in terms of the piece’s overall look and longevity — especially when considering how the new fabric is applied. We often see people upholster fabric on top of pre-existing fabric (inserting a layer of cotton between). Although this can look great at first, it’s not functional across time and bunching may occur.

Tip #3: Know that reupholstering can take more time than anticipated

While reupholstering seems as though it’s a straightforward process, it requires time and skill. For example, don’t be surprised if one chair takes 3-4 hours after the fabric is removed. In some cases, this timeframe may be even longer — especially if there are a lot of corners.

Tip #4: Do your research

Before you begin, make sure you have everything you need and that you are confident in regards to the required techniques. For example, does your pattern call for pleats? Perhaps you are in need of a box-pleated skirt? In most cases, you’ll also require specialized tools. If you do decide to invest in professional reupholstery services, it’s important that you research the company as well, particularly in terms of their reputation and capabilities.

Tip #5: If in doubt, call furniture restoration professionals

If you have any doubt in terms of what to do, how to do it, or even what fabric to use, it’s best that you call a professional furniture restoration company. The last thing we suggest is attempting a DIY furniture upholstery project when you do not have the right tools or skills. While you may save money at first, if damage occurs in the process, you may pay a lot more in the long-term to restore that issue in addition to a reupholstering service. Professional reupholstery in Newton, MA is just one phone call away. If you require the type of specialized skills that will ensure quality work, we’re here to help. Owned and operated by the Trefler family since 1921, we continue to be one of the largest and oldest restoration companies in the United States. We’re in the “fine art of restoring your favorite things” — so be sure to contact us today with any questions, we’re here to help!

1410Your Complete Guide to Antique Furniture Restoration

When it comes to the longevity of antique pieces of furniture, regular antique furniture maintenance is imperative. Whether that means tending to upholstery or fixing structural issues, an investment in furniture restoration could make all the difference. Whether you have an antique chair or rustic desk that requires some extra attention, here’s what you need to know about.

Signs That Your Antique Furniture Needs Restoration

If you have upholstery that is stained and is all-around unpleasant to look at, the furniture restoration process can help you rejuvenate antique pieces. Although regular antique furniture maintenance will help you keep your upholstery clean, particularly when you regularly vacuum, preventing the accumulation of dirt, a professional service will become necessary at some point. If any of the following apply, you may want to consider a professional, custom upholstery service:

1. Your furniture looks dull, is lifeless, and lacks the luster it once had

This is common when furniture is exposed to direct sunlight and a lot of traffic. If you’re unsure whether or not your upholstered piece of furniture has changed in color, look at an area that is not often used (i.e. a section between the cushions). If you notice differences in the color, a professional furniture repair service can help you revive your piece. The same is true for wood pieces that have lost their color.

2. There is a presence of stains, scratches, or grooves

Whether you have stubborn stains on your upholstery or water stains on antique wood furniture, these areas can significantly impact the overall look and even the value of select pieces. Depending on the material and what stained it, various antique furniture restoration techniques may be required. If there are significant scratches or grooves that require attention, these can also be remedied during the restoration process.

3. The furniture has an odor

Whether you have been living in a house of smokers or had a mild-scented piece of furniture passed down to you, furniture restoration can help combat musty, undesirable scents. Requiring a number of antique furniture restoration techniques, particularly when the material is wood, a number of steps may be required. For example, a musty wood desk would likely need to be dehumidified, sanded, and refinished; whereas upholstery may require a deep clean, patching, or may need to be replaced completely.

Should You Replace Your Furniture or Restore It?

If you’ve never worked with a professional furniture restoration company in the past, you may be surprised what is fixable. Whether you think a piece is too dirty and scratched or is no longer desired based on its “banged up” appearance, there are many techniques available which will help you restore your favorite antique pieces. In some cases, you may choose to replace select areas or parts of your furniture while restoring the remaining areas. Reupholstering is an excellent example, as you can achieve optimal quality without sacrificing the entire piece. For example, you may have an antique chair that is still structurally sound, yet requires a fresh face-lift. The wood could be restored and the fabric reupholstered. When deciding whether or not to replace or restore old furniture, you need to first consider its quality, age, and sentimental value. For example, although it may end up being cheaper to get a new piece of furniture, you need to ask yourself if it will compare in terms of its older, higher quality counterpart. Furniture restoration is an investment — especially when the furniture is worth something, to begin with.

An Introduction to Antique Furniture Refinishing Techniques

Although you can refinish or even redesign everyday furniture, when dealing with antiques, it is always best to leave key techniques to professionals. When it comes to furniture restoration techniques, the ultimate goal is to effectively preserve the piece of furniture, but how that’s achieved depend on the material and whether or not the piece if a valuable antique — either in terms of its monetary or emotional value, such as the case with a family heirloom. The technique used will also vary depending on what needs to be accomplished. For example, missing scrolled parts will require unique steps and techniques in comparison to changing a finish or reversing water damage. While repairing an item can increase functionality, in order to truly restore furniture, that requires an artistic touch. In terms of a complete furniture restoration, you can benefit from a wide range of techniques and services, including those that restore inlays and veneer, repair damaged parts and surfaces, and fix structural issues.

Who to Call When You Require Furniture Restoration Services

When you’d like to restore your furniture, it’s imperative that you seek the assistance of a professional. They will be able to determine the best course of action in terms of the piece itself. This is particularly true when a piece of furniture is rather valuable or out of the ordinary. For antique furniture restoration in Massachusetts, Trefler’s is a name you can count on. Owned and operated by the Trefler family since 1921, we are known to offer some of the best repairs in the world. Using modern technology, combined with century-old techniques, there is a reason why Trefler’s is one of the largest and oldest furniturerestoration companies in the country. Whether you’re looking for a wood furniture refinishing service or are in need of furniture reupholstery in Newton, MA, Trefler’s can assist you with the fine art of restoring your favorite antique pieces of furniture. Get a custom quote today!